
With archery deer season quickly approaching, there is no better time than now to make sure that both you and your equipment are ready for opening day.
Summer is in full swing, which for many of us means archery deer season is just around the corner. Hopefully your bow has been getting a regular workout since last deer season, and you’re just waiting on the arrival of opening day to kick off a successful season. But if you’re like a lot of bowhunters, spring and summer have been filled with family activities and other outdoor pursuits, and you haven’t had a lot of time to sharpen your shooting skills. If that’s the case, there is no need to panic. With a little bow maintenance and some real-world archery practice, you still have time to prepare for opening day.
Preparing Your Equipment
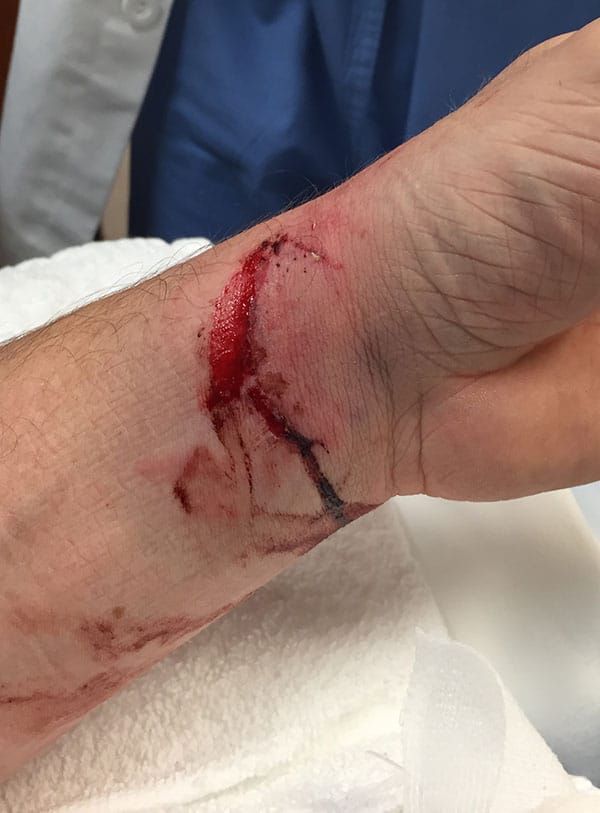
Always check your equipment thoroughly before use. The author’s friend suffered a serious wrist injury when he had a carbon arrow malfunction.
Regardless of whether you’ve been shooting all summer or you’re just now getting your bow out, this is a great time to inspect your equipment and perform any maintenance that may be needed before the season opens. This should include a thorough check of your limbs and cams for any nicks or cracks; checking your strings, cables and servings for fraying or wear that could signal it’s time for new threads; as well as checking the tightness of all the bolts holding your bow’s accessories, such as those for the sights, quiver and rest. You’ll also want to check your arrows for straightness, torn or loose fletchings and any nicks or cracks in the carbon. If there’s any question at all about the integrity of an arrow, toss it. Arrows aren’t cheap, but it’s not worth risking a potentially serious injury to save a few bucks.
Once you’ve determined everything on your bow is in good shape, a good tune-up may be in order. If you’re experienced setting up bows, then it may be as simple as checking your nocking point and center shot and making sure the cam timing is correctly set (if you shoot a dual-cam bow). If you’re not comfortable doing these things yourself, take your bow to a reliable shop and let them check it out for you. The sooner the better on this step, as bow shops — especially the good ones — tend to get extremely busy the closer it gets to deer season.
After your bow has been through routine maintenance and tuning, it’s time to get out there and get yourself in tune for deer season!
Practice Like You Hunt
With limited practice time between now and deer season, it’s important to make every minute of practice count. And while standing at an even 20 or 30 yards shooting at spots on a bag target will certainly help solidify your form and strengthen your shooting muscles, it won’t do much else to prepare you for that moment of truth. Deer seldom make the mistake of walking in at exact 10-yard increments and providing perfect, unobstructed, broadside shots. And they dang sure won’t have a bright red spot on their vitals to give you a place to settle your pin. Even if all that were to happen, chances are your heart will be racing and you won’t be thinking as clearly as you do during a mundane practice session.
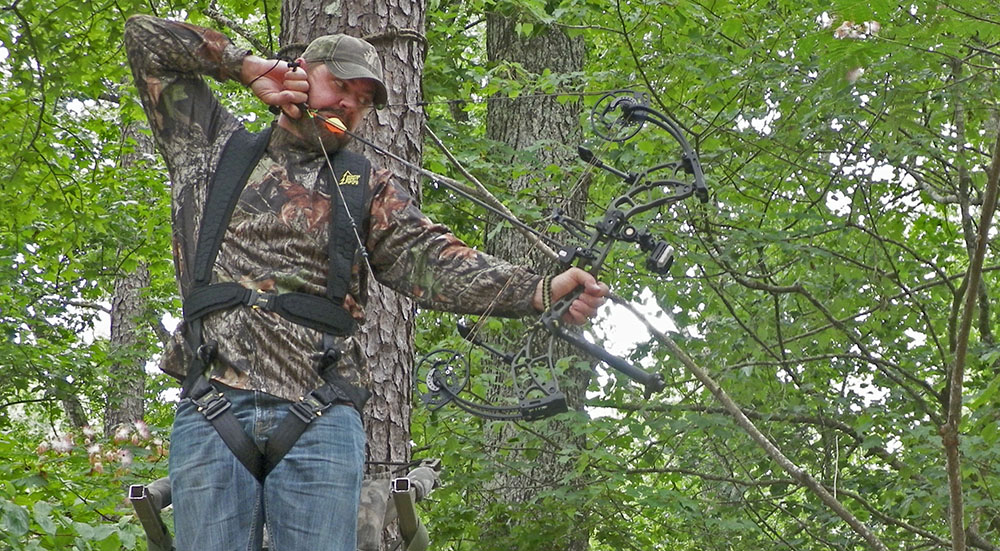
The only real way to prepare for that moment of truth is to practice in as close to actual hunting conditions as possible. This means throwing in all the variables of odd distances, vertical angles, weird body positioning, natural obstructions and a racing heart that is beating so loud you’re sure that buck is going to hear it and look straight up at you any second. So let’s take a look at how to maximize your archery practice by incorporating all of these real-world variables.
Distance
I’d hate to even guess how many deer I missed when I first took up bowhunting as a teenager. I would stand out in the backyard for hours, exactly 20 paces from two strategically placed bails of straw, and sling arrow after arrow into an 8-inch paper plate. I was extremely confident in my ability to hit the vitals of a deer at 20 yards. Unfortunately, when an actual deer would walk into my hunting setup, it never seemed to be at that magical distance and I would end up shooting well over its back or, in most cases, under its belly. I was terrible at estimating distance (especially while under the influence of buck fever), and I’m pretty sure I’m not the only one who has suffered from that affliction. I would venture to guess that more archery shots are blown due to misjudged yardage each deer season than for any other single reason. Even with the blazing-fast speeds of today’s bows, it still only takes a small miscalculation to send your arrow into parts unknown, or even worse, into a non-vital area of the deer.

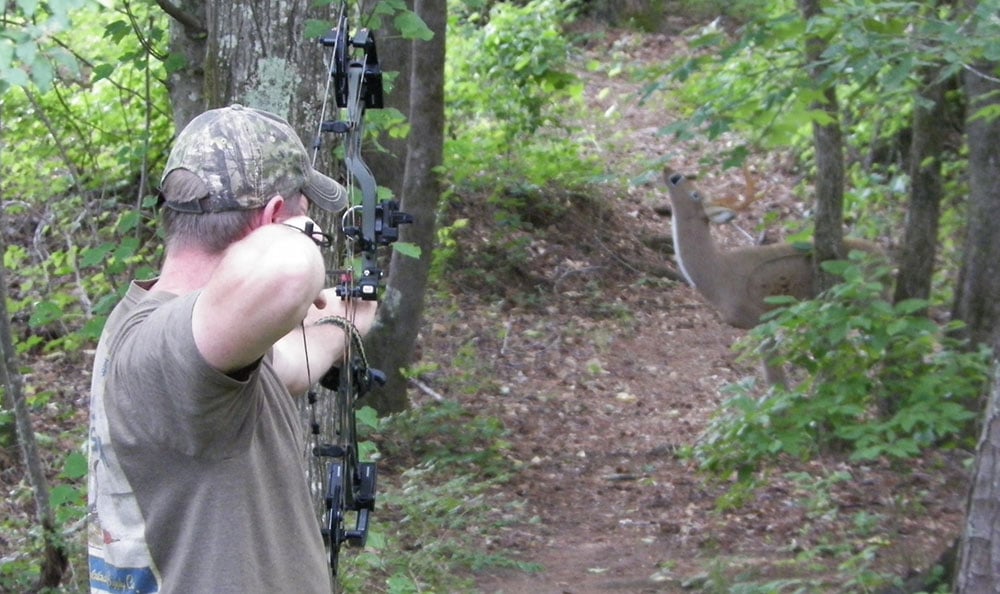
While the use of a rangefinder takes the guesswork out of estimating yardage, you may not always be in a position to use one. Being able to judge yardage out to your effective range is critical to consistently making good shots on deer.
Many of today’s well-equipped hunters have offset this problem with the purchase of a laser rangefinder. With just the touch of a button, you can know within a yard or less just how far away a deer is standing. If such a purchase fits into your budget, then I highly recommend it. However, owning a rangefinder is not a replacement for being able to estimate yardage. Batteries can fail, and deer can slip in without warning. Because of this, every bowhunter should be proficient at judging yardage out to their maximum effective shooting range. To do so requires regular practice.
There are several ways you can work on this, and you don’t always have to have your bow in hand. A tip from a fellow 3D archery shooter finally helped me overcome my yardage-estimation woes. He suggested that anytime I was out working in the yard or in the woods scouting, to pick out random objects at various distances and guess how far away they were. I would then step it off to see how close I had guessed. If you have trouble judging yardage, I would encourage you to do the same. Just be sure to practice in both wooded and open areas, because there can be a real difference in distance perception between the two.
Not only will you want to practice judging various distances, but you will want to practice shooting from those distances as well. Don’t limit yourself to shooting in 10, or even 5-yard increments, because deer don’t always walk in at those exact distances. The goal is to know exactly where you need to aim regardless of where the animal steps out. This type of random-distance shooting will also allow you to work on another common bowhunting variable — shot angle.
Shot Angles
When I say shot angle, I am referring to the vertical angle formed by the hunter being either above or below the deer. In most cases, this is caused by the hunter being elevated in a treestand. However, steep terrain can also play a factor in vertical angle. How much effect it will have on your shot, though, will vary depending on factors such as bow speed and arrow weight and can only be determined by practicing at these various angles.
A good way to practice these shots is to shoot from either a treestand or a second-story deck. If it’s not possible to do this in your own yard, then you now have a good excuse to head to the local woodlot with your bow, target, safety harness and treestand. This is best (and safest) to do with a partner so he/she can retrieve your arrows and you won’t have to keep climbing in and out of your treestand.
When it comes to bowhunting, it seems the number of things that can cause a hunt to go wrong are infinite. While there is no way to prepare for every situation, you can be prepared for the variables that are most likely to occur.
Body Position
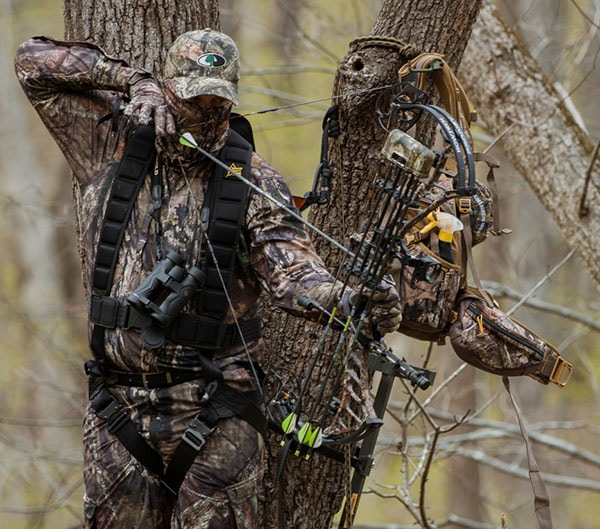
Have you ever noticed that when it comes to deer hunting, Murphy’s Law often prevails? What can go wrong will go wrong. Deer seldom do exactly what you expect them to do or come in just the way you hoped. This often translates into having to take a shot in a different direction than what you had planned, or if the deer slips in unannounced, taking a shot from a sitting or awkward position.
Working various body positions into your practice routine is not difficult and doesn’t require anything special. It is just a matter of getting into the habit of alternating shots from your normal stance, with any other possible body positions that could occur during an actual hunt. These may include planting your feet at various angles in relation to the target, as well as squatting, kneeling or even sitting comfortably in your treestand seat.
Try to imagine as many scenarios as possible, and work them into your practice routine. That way, the next time that old buck slips in silently from behind the tree you’re in, you can return the favor by slipping a razor-sharp broadhead right behind his shoulder, because you will have practiced that same shot over and over again.
Obstructions
If you have been hunting for any length of time, then chances are you have missed an animal at some point because your arrow hit a branch or tree. You can’t do much about the ones you didn’t see, but when it comes to shooting through or next to obstructions like these, it doesn’t have to cost you a deer.
I am certainly not suggesting shooting through thick brush or branches that are covering the vitals of an animal. What I am referring to is shooting through openings in these barriers, or shooting at an animal positioned right next to a large tree. I’ve seen this play out numerous times at local 3D archery shoots, and have even fallen victim to it a time or two myself. You’re shooting at a target with its “vitals” barely clearing a large tree. While the tree doesn’t have a physical impact on the shot, just the intimidation of it being there often causes the archer to err away from the tree and into a lower-scoring area of the target. That’s not a huge deal when you’re shooting at foam, but it can be the difference between a clean kill or a long night of blood-trailing when there’s a real deer in your sights. The good news is that this kind of mishap is preventable and is a fairly easy variable to practice for the upcoming season.
If you are practicing in the yard, simply use the available landscape to create intimidating obstacles. If you’re heading for the woods to shoot, then it should be even easier to come up with lots of obstructions to sharpen your shooting skills. Using the obstacles at hand, simply place your 3D target in as many real-life-hunting situations as you can. When you take the shot, put all your focus on your small point of aim, blocking out any potentially intimidating brush or trees.
Physical Preparation
We often refer to that rush of adrenaline that comes with an approaching deer and an eminent shot as “buck fever.” Unfortunately, there is no way to recreate that exact feeling when practicing with your bow (wouldn’t it be great if we could?), but there are ways to prepare for it to some extent. The next time you are out practicing your bow. Take a minute to do a quick burst of exercise, whether it is running in place or a series of jumping jacks — anything to elevate your heart rate. Then pick up your bow, draw and make the shot. You don’t have to do this for every shot you take, but be sure to incorporate it frequently in your practice routine.
Besides having to overcome the physical effects of buck fever, we also sometimes have to be able to hold our bow back longer than normal before releasing. I was reminded of this last season, when I drew back on a doe that had just stepped behind a large white oak tree. She had come in at a steady pace, but as soon as I drew back, she decided it was a good time to stop and feed on some acorns. After what seemed like an eternity, she eased out from behind the tree and presented me with a nice broadside shot. If I had not been shooting regularly for weeks at that point, and practicing holding back my bow for longer-than-normal periods of time, I’m not sure I could have held at full draw for as long as I did; at least not without getting wobbly-armed. You can address this in your practice routine by drawing your bow back and holding it for anywhere from 10 to 20 seconds before releasing. This will help build your shooting muscles and keep the wobbly arms at bay this fall.
The only real way to prepare for that moment of truth is to practice in as close to actual hunting conditions as possible.
Putting It All Together
While it may seem that practicing for all these situations would take hours, or a variety of shooting stations, that doesn’t have to be the case. You should be able to work all of the variables covered here into a single practice session, by incorporating as many as possible into each shot. This is best done with a shooting partner. Grab your bows, a treestand and 3D target, and head for a nearby woodlot. You will have to alternate back and forth between being the shooter and target person.
 The shooter should put the stand in a suitable tree and get his or her bow ready. The other person can then place the target at random distances and angles, using natural terrain and obstructions to simulate actual hunting conditions as closely as possible. The shooter then gets one shot at each target placement (just as you would in real hunting). As mentioned above, be sure and vary your own body position with each shot to make your practice sessions as effective as possible. After 10 or 20 shots, you can then switch up with one another.
A couple of additional items worth mentioning are the clothing you wear and the arrow points you use. Since the goal is to simulate actual hunting conditions as closely as possible, it only makes sense to practice in your hunting clothes using the same broadheads that you will be using during the season.
Clothing such as gloves, face nets, hats, jackets or heavy shirts and your safety harness or vest can all have an effect on your shot execution. This especially holds true for late-season hunting, when a bowhunter is often bundled up in an attempt to stay warm. Don’t wait until a nice buck is standing broadside at 20 yards to discover an article of clothing interferes with your anchor point.
Conclusion
When it comes to bowhunting, it seems the number of things that can cause a hunt to go wrong are infinite. While there is no way to prepare for every situation, you can be prepared for the variables that are most likely to occur. Being able to estimate the distance to an animal and then executing the shot regardless of your body position or the position of the deer will greatly increase both your confidence as well as your chances for success in bowhunting.