
Long ago, I made the decision to process my venison for the freezer at home, in my own relatively small kitchen. My basic tools and procedures have remained simple because they work and because I don’t have the room or the need to advance my home-processing equipment. So, I can help you learn how to process your venison at home with very few expenses and even in tight quarters, like small apartment kitchens.
Home processing is not difficult, and there are many benefits I’ve come to know. I save money by avoiding commercial processing fees. I know exactly what parts go into my grinder. I can custom-package the products in sizes that fit my family’s needs for an average meal. I get the additional satisfaction that comes with self-sufficiency and do-it-yourself achievement. Finally, there’s just something therapeutic or stress-relieving about disassembling venison and rendering it into freezer packages.
Here are 10 essential tools you need to have on hand for basic home-processing, and you probably already own some of them. I’ll start by assuming you’ve already field-dressed, skinned and quartered your deer. A bonesaw is helpful for quartering but isn’t necessary, as it’s possible to de-bone quarters with only your skinning knife.
Large Cooler for Aging
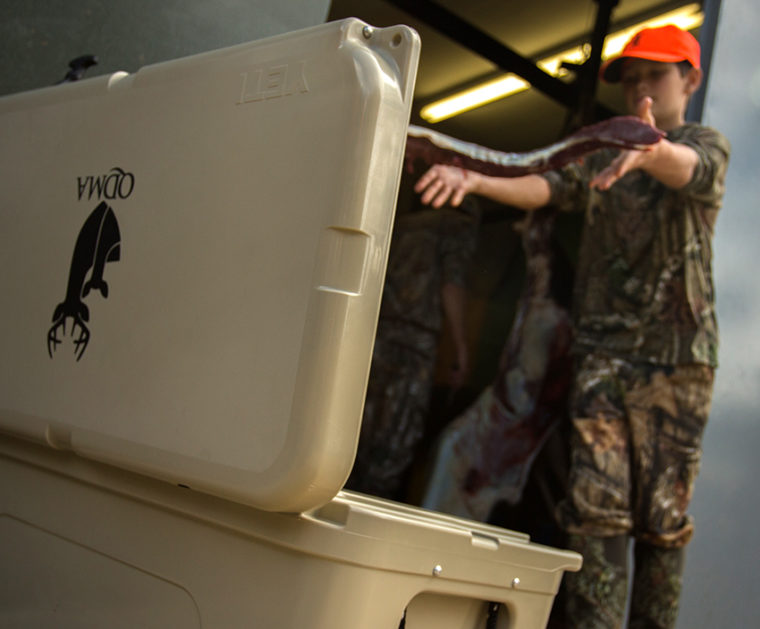
You’ll need to store backstraps, tenderloins, hindquarters, shoulders, the neck roast, and maybe a plastic bag of miscellaneous pieces for the grinder (like the strips removed from between the ribs) on ice until you can process them further. More importantly, I like to age all portions that will not go into the grinder. Venison that will be ground into burger does not need to be aged, but other cuts will be more tender and tasty if you can age them seven to 10 days on ice, in a refrigerator, or anywhere below 40 degrees F but not so cold that the meat freezes. I don’t have a spare refrigerator that will hold a quartered deer, and I live in the South where it’s usually too warm to hang a deer in the open air, so I use a large cooler.
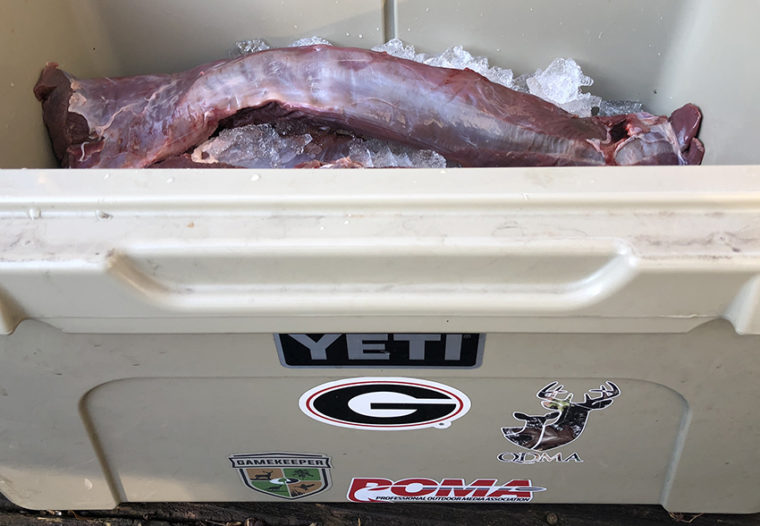
Backstraps, tenderloins, roasts and any large cuts that won’t be ground into hamburger can be aged on ice for seven to 10 days to enhance flavor and tenderness. Keep meat on top of the ice or separated from it by plastic, and do not let meat sit in meltwater at any point during aging.
Aging venison on ice is also helpful because it allows me to postpone processing until a day and time that might be more convenient for me than the day of the successful hunt.
When aging with a cooler, store all meat on top of the ice, and keep the meat dry. Drain meltwater from the bottom of the cooler regularly and refresh the ice as needed until processing day arrives. Don’t let the ice run out, and don’t let any meat sit in water. Backstraps, tenderloins and small cuts should be placed in plastic bags while aging so they never end up soaking in meltwater.
I do all of my processing, including grinding, in one day. On average, it takes me a little over two hours of steady work to go from a cooler full of quartered venison to a freezer full of packaged venison, including kitchen clean-up time. If you have an assistant, it will go faster.
Knives and a Knife Sharpener
As you already know if you skinned and quartered your own deer, a sharp knife is an important tool for any deer hunter. You can continue to use your skinning knife (after washing it, of course) to de-bone and process the venison for the freezer. However, additional knives can be helpful for specific uses.
A small, short-bladed skinning knife is handy for the finer work of de-boning and separating muscle groups into roasts. I also use a filet or slicing knife with a long, thin blade for slicing off “silverskin” and tougher muscle sheath tissue, slicing steaks out of large roasts, and also for slicing larger pieces into thin strips for the grinder.
As with skinning and quartering, the processing work will go much faster and easier as long as your blade is sharp. Pause when needed to hone your blade. I am not very good with a whet stone, so I use a WorkSharp electric knife sharpener to quickly put a sharp blade on my knives.
Cutting Board
You’ll need an open surface for de-boning the shoulders and hindquarters, separating muscle groups, cutting away parts you will discard like sinew and fat, and cutting up the larger steaks and roasts for freezing. This can be a kitchen counter if you don’t mind scoring it with sharp blades, but a wooden or synthetic cutting board is better. I have a wooden board with adjustable handles that hold it in place over my kitchen sink (see below), which makes it easy to rinse the board and clean up. This board will not slide or shift position as I work.
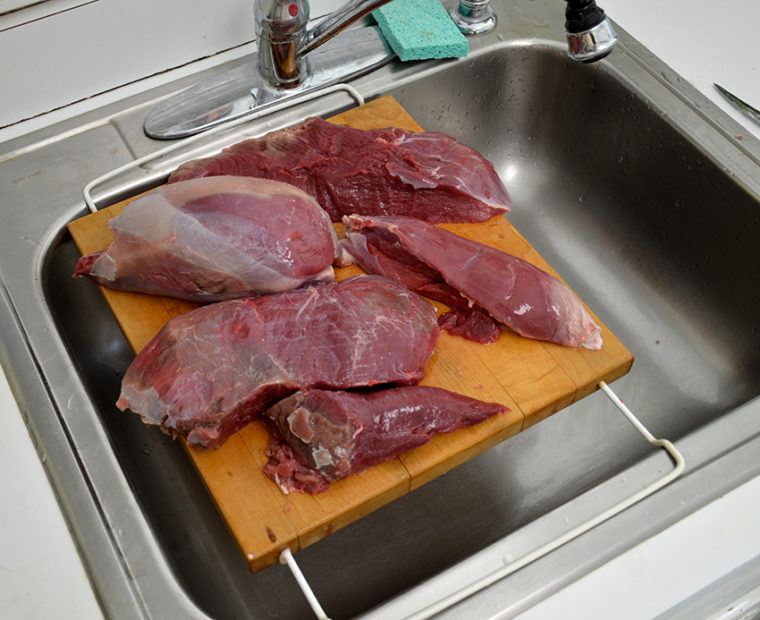
Here are the major roasts and cuts in a venison hindquarter, separated (not including the shank). A good cutting board or butcher’s block will be needed for the separation work.
By the way, this stage of work is made easier if you already de-boned the shoulders and hindquarters in the field. There’s not always time for this, but when it works out, I prefer to debone at least the hindquarters before they go into the cooler for aging and before I bring them home to my kitchen. If you can discard everything but boneless venison before you leave the field for home, kitchen processing will be easier, especially when it comes to finding an appropriate way to dispose of large bones.
Set of Large Bowls or Pans for Sorting
As you break down the quarters, you will separate everything into large cuts like steaks and roasts, small pieces that will go into the grinder, and connective tissue that will be discarded. I use a set of aluminum bowls in various sizes at this stage. A small bowl is for discards. A larger bowl catches all the burger cuts, and a third bowl holds roasts. A set of light, metal bowls like this is cheap and useful, but you can also buy re-usable aluminum casserole pans for the same purpose.
Kitchen Grinder
This is really the most basic piece of complicated processing equipment you will need to buy. Being able to grind smaller, tougher portions allows you to prepare chili, spaghetti, tacos, stroganoff, meatballs and so many other recipes. My wife and I already owned a nice electric kitchen mixer with an adapter for various add-on features, and one of those add-ons is a small grinder attachment. It’s not a powerful grinder, and it helps to cut all the meat into thin strips before feeding it into the grinder, but it gets the job done.
If you don’t own a grinder already, I advise you to invest in a good stand-alone grinder like those made by Weston Brands. Process one or two deer by yourself and you will have paid for it.
Hand-crank grinders are available and less expensive, but of course it will require a little more time and a lot more muscle to finish the job.
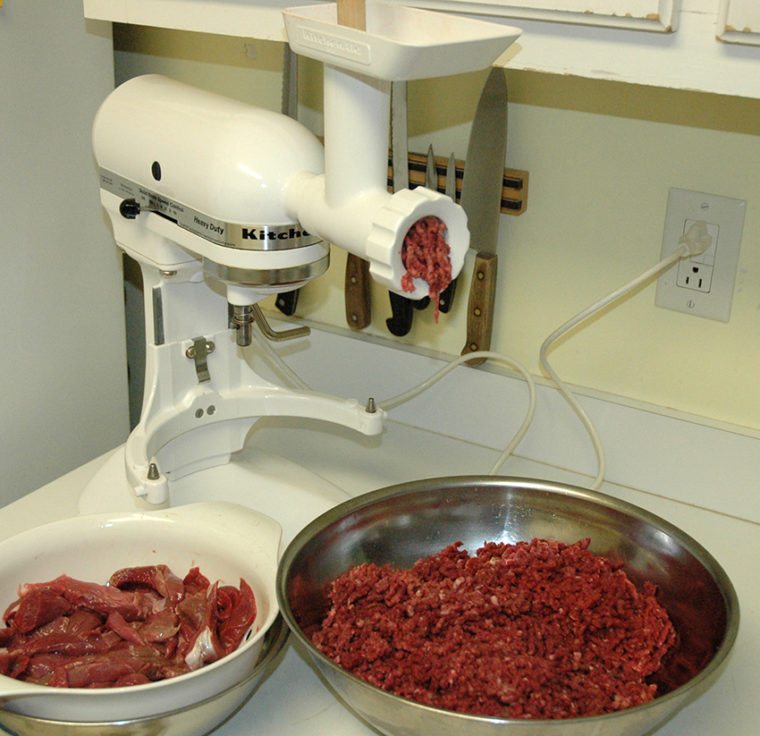
You may already own a kitchen mixer that allows for attachments, like a meat grinder. This one has produced hundreds of pounds of ground venison.
Small Kitchen Scale
A small kitchen spring-scale will be very useful for packaging ground venison in practical sizes. Depending on how much venison you typically use for the average meal, you can store half-pound, one-pound or larger packages as needed. I have a 16-ounce (1-lb.) scale. I set a light plastic container on the scale, adjust the dial to calibrate the scale back to zero, then fill the container with ground venison until it weighs a pound.

A spring-scale comes in handy for weighing out packages of ground venison in preferred amounts.
Freezer Paper
I wrap all my venison in a single layer of freezer paper. I prefer to use paper instead of creating more plastic waste with a vacuum sealer, and a sealer means another piece of equipment to buy and store. I used to wrap everything first with plastic wrap before wrapping in freezer paper, but I’ve gone to using just a single layer of coated freezer paper, and I’ve never had any trouble with freezer burn when storage is less than one year. Venison rarely lasts that long at my house anyway.
My next acquisition is a freezer-paper dispenser. For years I’ve just used the serrated edge on the freezer-paper box to cut the roll, but this gets old. I’ve decided it will be worth finding storage space for a dispenser.
Freezer Tape & Dispenser
You’ll need this for taping your freezer paper packages. It is a huge convenience to have a masking-tape dispenser as well, so that you can grab and cut a small strip of tape with one hand while you hold a folded package shut with the other hand.
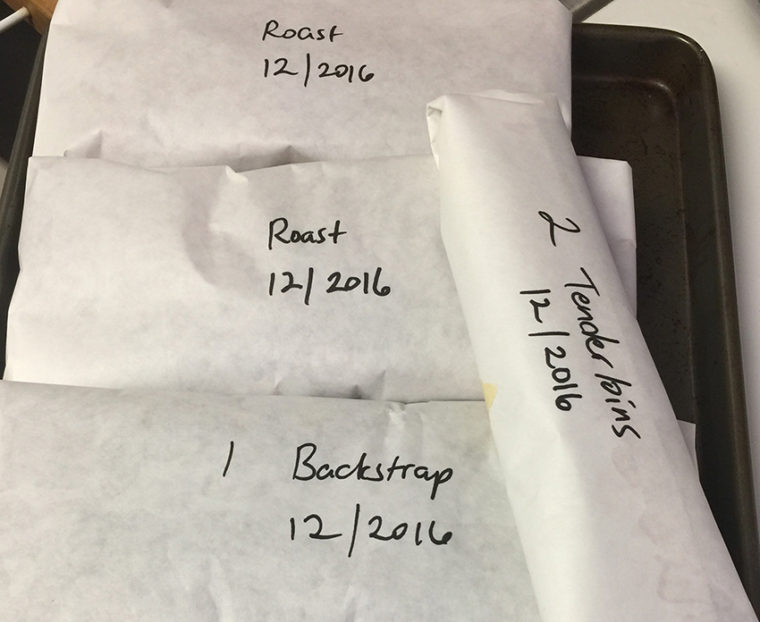
Sharpie
For marking your completed freezer packages. Indicate the contents such as roast, ground, tenderloin, and so on. Also write the date of the harvest, and I usually add whether it’s a buck or doe in the package. If you measure out varying weights of burger packages, write the weight as well. Write large and clearly to minimize your sorting and searching time later on when you’re rummaging in a cold freezer.
If you have multiple hunters in the house, especially young hunters, it’s good to also record the hunter’s name on each package. With each meal, you can celebrate the successful hunter who provided it.
Bonus Gear
The items listed above are what I feel are the bare essentials of home processing, but of course there are lots of other items that would be nice to own if you have the budget and space. From stand-alone grinders to cubers and sausage stuffers, you can take this as far as you like.
One of the rewards of hunting is the joy of providing your own natural food. I highly recommend it! This year, give home processing a try and enjoy getting both hands into the entire process from field to table.